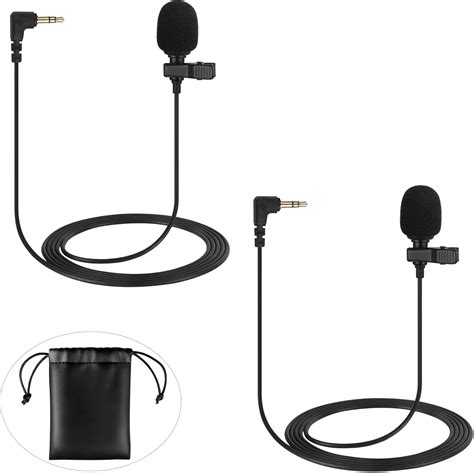
Unleash the power of crystal-clear audio with Amazon’s Lavalier Microphone. This professional-grade wearable microphone seamlessly integrates with your Amazon Echo or Fire TV devices, allowing you to enjoy exceptional voice quality for video calls, presentations, and more. Its ultra-slim design and high-sensitivity capsule capture your voice with unmatched precision, ensuring your every word is heard loud and clear.
Setting up your Amazon Lavalier Microphone is a breeze. Simply connect the 3.5mm jack to your compatible device, and you’re ready to go. The built-in noise reduction feature automatically filters out unwanted background noise, so you can focus on delivering your message without distractions. Furthermore, the adjustable clip and flexible gooseneck enable you to position the microphone optimally for maximum clarity and comfort.
Whether you’re a seasoned professional or aspiring creator, the Amazon Lavalier Microphone empowers you to elevate your audio experience. Its versatile design and exceptional sound quality make it an indispensable tool for anyone seeking to enhance their communication and creativity. Discover the unmatched clarity and convenience of the Amazon Lavalier Microphone today, and let your voice be heard with confidence and distinction.
Selecting the Right Lavalier Microphone
Choosing the ideal lavalier microphone is crucial for capturing clear and professional-quality audio. Consider the following factors when making your selection:
- Microphone Type: Lavalier microphones come in three main types: omnidirectional, cardioid, and directional. Omnidirectional microphones pick up sound from all directions, providing a natural and ambient sound. Cardioid microphones focus on the sound source in front of them, reducing unwanted noise. Directional microphones have the narrowest pick-up pattern and offer the best noise isolation.
- Frequency Response: The frequency response of a microphone determines the range of frequencies it can capture. For speech and vocals, look for microphones with a frequency response that covers the human voice range (80-15,000 Hz).
- Sensitivity: Microphone sensitivity measures how well it converts sound into an electrical signal. Higher sensitivity microphones are more efficient at picking up audio, making them ideal for quiet environments.
- Output Level: The output level of a microphone refers to the strength of the electrical signal it produces. Higher output levels produce louder recordings, while lower output levels may require additional amplification.
| Microphone Type | Polar Pattern | Frequency Response | Sensitivity | Output Level |
|---|---|---|---|---|
| Omnidirectional | All-around | 80-15,000 Hz | -40 dBV/Pa | -30 dBV |
| Cardioid | Front-facing | 80-15,000 Hz | -35 dBV/Pa | -25 dBV |
| Directional | Narrow | 80-15,000 Hz | -30 dBV/Pa | -20 dBV |
Positioning the Lavalier Microphone
The placement of the lavalier microphone is crucial in capturing clear, intelligible audio. Here are some guidelines to help you position the microphone optimally:
High or Low
Determine the appropriate height for the microphone based on the speaker’s vocal projection. If the speaker has a strong voice, place the microphone slightly lower than their mouth to minimize distortion. For speakers with a softer voice, position the microphone closer to the mouth to enhance their volume.
Distance from Mouth
Maintain a distance of 6-12 inches (15-30 cm) between the microphone capsule and the speaker’s mouth. This distance allows for clear speech capture without overpowering sibilance or plosives. Too close a distance can result in muffled audio, while too far away can lead to room noise and background interference.
Directionality
Consider the directionality of the lavalier microphone. Most lavalier microphones feature an omnidirectional polar pattern, which means they capture sound from all directions. However, some models offer a cardioid polar pattern, which is more focused and helps reduce unwanted noise.
Tips for Positioning
– Avoid placing the microphone directly in front of the speaker’s mouth, as this can create a “popping” sound when plosives are pronounced.
– Position the microphone slightly to the side of the mouth, adjusting the angle to minimize breath noise.
– Use a windscreen or foam cover to reduce wind noise and other environmental distractions.
| Positioning Option | Advantages | Disadvantages |
|---|---|---|
| High | Reduced distortion | May not capture lower frequencies as effectively |
| Low | Improved capture of lower frequencies | Can result in distortion if the voice is too loud |
| Close | Enhanced volume | Can lead to muffled audio |
| Far | Reduced background noise | May result in lower volume |
Connecting the Microphone to Your Device
To connect the lavalier microphone to your device, follow these easy steps:
- Plug the Microphone into Your Device
- Enable Microphone Input
- Test the Microphone
Locate the appropriate audio jack on your device. For smartphones, this is typically a 3.5mm TRRS jack, while for cameras, it may be an XLR or 1/4-inch TRS jack. Connect the microphone’s plug into the jack firmly.
Go to the audio settings on your device and make sure that the lavalier microphone is selected as the input device. This may vary depending on your operating system or device type.
Speak into the microphone and monitor the audio levels on your device. Adjust the microphone settings as needed to optimize the sound quality. Note that some devices may require additional configuration steps or settings to enable proper microphone functionality. If you encounter any issues, consult your device’s user manual.
| Device | Audio Jack Type |
|---|---|
| Smartphone | 3.5mm TRRS |
| Camera | XLR or 1/4″ TRS |
Configuring Sound Settings
To optimize the sound quality of your Amazon Lavalier Microphone, follow these steps:
- Connect the microphone to your compatible device.
- Open the audio/sound settings on your device.
- Navigate to the microphone input settings.
- Select the “Amazon Lavalier Microphone” as the input source.
Below are additional sound settings you can adjust to enhance the audio quality:
- Microphone Gain: Adjust the microphone sensitivity to amplify or reduce the audio level of your voice.
- Noise Reduction: Enable this feature to suppress background noise and improve voice clarity.
- Equalizer Settings: Fine-tune the audio balance by adjusting the frequency bands. Experiment with different settings to find the optimal sound profile for your voice and environment.
Note: The availability of these sound settings may vary depending on your device and operating system.
- Test the microphone and make adjustments as needed to ensure that your voice is clear and at an appropriate volume level.
- Attach the microphone to your clothing. The microphone should be positioned close to your mouth, but not so close that it picks up your breath. You can use the included clip to attach the microphone to your shirt or jacket.
- Connect the microphone to your recording device. The microphone will come with a cable that you can use to connect it to your camera, smartphone, or other recording device.
- Start recording. Once you have the microphone connected, you can start recording your video. The microphone will automatically pick up your voice and transmit it to your recording device.
- The type of recording device you will be using. Some microphones are designed to be used with specific types of recording devices, so it is important to make sure that the microphone you choose is compatible with your device.
- The environment in which you will be recording. Some microphones are designed for use in noisy environments, while others are better suited for use in quiet environments.
- Your budget. Amazon lavalier microphones range in price from around $20 to $200. It is important to set a budget before you start shopping so that you can narrow down your options.
| Android | iOS |
|---|---|
| Settings > Sound & Vibration > Microphone | Settings > Privacy & Security > Microphone |
Troubleshooting Audio Issues
Verify Receiver and Transmitter Power
Ensure the receiver and transmitter are powered on. Check that the transmitter is securely plugged into the battery pack and the receiver to the power source. Replace the batteries if they are low or depleted.
Check Volume Levels
Adjust the volume on both the receiver and the transmitter. If the volume is too low, increase it until you hear clear audio. If the volume is too high, decrease it to avoid distortion.
Scan for Interference
Radio frequency (RF) interference can disrupt audio. Identify potential sources of interference, such as Wi-Fi routers, Bluetooth devices, and cordless phones. Try moving the receiver and transmitter away from these sources or switching to a different RF channel.
Ensure Proper Signal Strength
The distance between the receiver and transmitter can affect the signal strength. Move the devices closer together or use an antenna to improve the signal. Consider using a directional antenna to focus the signal in a specific direction.
Other Troubleshooting Tips
| Issue | Solution |
|---|---|
| No audio | Check connections, power, and volume levels. Reset the transmitter and receiver by turning them off and back on. |
| Distorted audio | Adjust volume levels. Reduce background noise or interference. Check if the microphone is too close to the sound source. |
| Intermittent audio | Ensure batteries are fresh and connections are secure. Check for interference from other devices or obstruction from walls. |
| Battery life issues | Use rechargeable batteries and replace them regularly. Optimize battery life by setting the transmitter to a lower power setting when not in use. |
Recommended Lavalier Microphones for Specific Needs
Choosing the right lavalier microphone for your specific needs is crucial for capturing high-quality audio. Here are some recommendations for various use cases:
Journalism and Interviews
For interviews and journalistic work, a discreet microphone with excellent voice clarity is essential. Consider the Rode Lavalier II, known for its exceptional sound quality and low visibility.
Film and Television Production
In film and television production, a microphone that can capture natural vocals in a boomless setup is preferred. The Sennheiser MKE 2 is a popular choice, offering broadcast-quality sound and a secure fit for actors.
Podcasting and Vlogging
For podcasting and vlogging, a versatile microphone that provides clear audio with minimal background noise is ideal. The Rode SmartLav+ is a great option, featuring a compact design and smartphone compatibility.
Music Performance
For live music performances, a lavalier microphone that can withstand stage conditions and deliver pristine vocals is necessary. The Shure SM31FH is a trusted choice, known for its rugged construction and ability to handle high sound pressure levels.
Teaching and Public Speaking
In teaching and public speaking environments, a comfortable and inconspicuous microphone that amplifies the speaker’s voice effectively is needed. The Samson Airline 77 is an affordable and reliable option, delivering clear audio without feedback issues.
Wireless Freedom
For applications requiring wireless mobility, consider a lavalier microphone with a built-in transmitter. The Rode RODELink Filmmaker Kit offers excellent sound quality, long battery life, and a compact design for easy setup and use.
| Microphone | Application | Key Features |
|---|---|---|
| Rode Lavalier II | Journalism, Interviews | Discreet, excellent voice clarity |
| Sennheiser MKE 2 | Film, Television | Broadcast-quality sound, secure fit |
| Rode SmartLav+ | Podcasting, Vlogging | Compact, smartphone compatible |
| Shure SM31FH | Music Performance | Rugged construction, high sound pressure handling |
| Samson Airline 77 | Teaching, Public Speaking | Comfortable, inconspicuous, feedback-resistant |
| Rode RODELink Filmmaker Kit | Wireless Mobility | Excellent sound quality, long battery life |
Best Practices for Long-Distance Recording
1. Optimize the Recording Environment
Minimize background noise and ensure the room is well-lit. Use sound-absorbing materials like carpets or curtains to reduce echoes.
2. Position the Microphone Correctly
Place the microphone close to the speaker’s mouth, within 6-8 inches. Experiment with different positions to find the optimal sound quality.
3. Use a Windscreen or Pop Filter
Attach a windscreen or pop filter to the microphone to reduce wind noise and plosives (popping sounds made by “p” and “b” sounds).
4. Test the Microphone Setup
Before starting a recording, test the microphone levels and adjust them accordingly. Ensure the levels are balanced and clear.
5. Use a Long-Range Wireless Transmitter
For recordings with greater distance, consider using a long-range wireless transmitter and receiver system to extend the microphone’s reach.
6. Monitor the Audio Levels
Keep an eye on the audio levels during recording to ensure they remain consistent. Avoid clipping or distortion by adjusting the gain as needed.
7. Use a Noise-Cancellation Preset
Most audio editing software offers noise-cancellation presets or plugins. Apply these to the recording to reduce unwanted background noise and improve audio quality.
| Noise Type | Suggested Preset |
|---|---|
| White noise | White Noise Reduction |
| HVAC noise | HVAC Noise Removal |
| Traffic noise | Traffic Noise Suppression |
Tips for Enhanced Audio Clarity with Amazon Lavalier Microphone
Positioning
Place the microphone 1-2 inches below your chin for optimal sound pickup. Avoid touching or rubbing against clothing to minimize background noise.
Gain Adjustment
Use the volume control on the microphone to adjust the gain level. Start with a low setting and gradually increase it until the volume is clear and balanced.
Proximity Effect
Speaking directly into the microphone can create a bass boost known as the proximity effect. Position the microphone slightly away from your mouth (about 1-2 inches) to avoid excessive bass.
Wind Noise Reduction
Use a foam windscreen or pop filter to minimize wind noise. These accessories create a physical barrier that blocks unwanted air turbulence from reaching the microphone.
EQ and Post-Processing
Apply equalization to enhance the sound quality. Use a low-pass filter to reduce unwanted low frequencies and a high-pass filter to brighten the audio.
Monitor Your Audio
Use headphones or speakers to monitor your audio while recording. This allows you to identify any issues with volume, clarity, or background noise.
Microphone Placement Comparison
| Placement | Effect |
|---|---|
| Chin | Optimal sound pickup, balanced volume |
| Chest | Reduced proximity effect, but may capture more clothing noise |
| Shoulder | Reduced wind noise, but may capture more background noise |
Troubleshooting Audio Issues
If you encounter audio problems, check the following: Microphone connections, cable integrity, gain levels, and software settings. Ensure that your recording software is enabled and configured correctly.
Advanced Features and Customization Options
1. Noise Reduction
The Amazon Lavalier Microphone offers advanced noise reduction capabilities to minimize background noise and ensure clear audio capture. Users can choose from several noise reduction levels to suit different recording environments.
2. Windscreen
The included windscreen effectively reduces wind noise and other unwanted sounds, making it ideal for outdoor recording or windy conditions.
3. Mobile App Control
The Amazon Lavalier Microphone can be controlled remotely via the Amazon Alexa app. Users can adjust settings, monitor audio levels, and enable features like noise reduction and noise suppression.
4. Bluetooth Connectivity
The microphone connects wirelessly to Bluetooth-enabled devices, allowing for seamless integration with smartphones, tablets, and other recording equipment.
5. Recording Modes
The microphone offers multiple recording modes, including mono and stereo, to cater to different recording needs and preferences.
6. Battery Life
The Amazon Lavalier Microphone boasts an impressive battery life of up to 12 hours, ensuring extended recording sessions without interruptions.
7. USB Charging
The microphone can be conveniently charged via the included USB charging cable.
8. Clip-On Design
The microphone’s versatile clip-on design allows for easy attachment to clothing, making it discreet and practical for hands-free recording.
9. Additional Customization Options
The Amazon Lavalier Microphone offers a range of customization options through the Amazon Alexa app. Users can adjust the following settings:
| Setting | Description |
|---|---|
| Gain | Controls the microphone’s sensitivity to sound. |
| Equalizer | Allows users to adjust the frequency response of the microphone. |
| Limiting | Protects against audio distortion by limiting the maximum output level. |
| Compression | Reduces the dynamic range of the audio, making it more consistent. |
Maintenance and Care of Your Lavalier Microphone
1. Proper Storage
Store your microphone in a clean, dry, dust-free environment. Use a padded case or pouch to protect it from scratches and damage.
2. Cleaning the Microphone Head
Clean the microphone head regularly with a soft, dry cloth or brush. Avoid using harsh chemicals or abrasives.
3. Cleaning the Cable
If the cable becomes dirty, wipe it down with a damp cloth. Do not submerge the cable in water.
4. Inspecting the Connector
Inspect the connector regularly for signs of damage or corrosion. Clean it with a soft brush or cotton swab moistened with rubbing alcohol if necessary.
5. Avoiding Moisture
Keep your microphone away from moisture, such as rain or condensation. If the microphone gets wet, dry it thoroughly before using it.
6. Avoiding Extreme Temperatures
Do not expose your microphone to extreme temperatures, such as freezing or overheating. This can damage the components.
7. Handling the Microphone Gently
Handle the microphone with care to avoid dropping or bumping it. Rough handling can damage the delicate components.
8. Using a Windscreen
Use a windscreen to reduce wind noise when using the microphone outdoors. This will improve the audio quality.
9. Avoiding Phantom Power
If your microphone does not require phantom power, avoid connecting it to a source that provides it. Phantom power can damage the microphone.
10. Detailed Care Instructions for Lavalier Microphones with Specific Features:
| Feature | Care Instructions |
|---|---|
| Condenser Capsule | Clean regularly with a soft, dry brush. Avoid blowing into the capsule. |
| Built-in Preamplifier | Protect from moisture and extreme temperatures. Handle gently and avoid dropping. |
| Waterproof Rating | Rinse with clean water after use in wet conditions. Dry thoroughly before storing. |
| Self-Powered | Replace batteries as recommended by the manufacturer. Avoid using rechargeable batteries. |
How To Use Amazon Lavalier Microphone
Amazon lavalier microphones are a great way to improve the sound quality of your videos. They are small and discreet, so they can be easily hidden under clothing, and they provide a clear and natural sound. Here are the steps on how to use an Amazon lavalier microphone:
People Also Ask About How To Use Amazon Lavalier Microphone
How do I choose the right Amazon lavalier microphone?
There are a few things to consider when choosing an Amazon lavalier microphone, including the following:
How do I use an Amazon lavalier microphone with my smartphone?
To use an Amazon lavalier microphone with your smartphone, you will need to use a TRRS adapter. A TRRS adapter is a small dongle that converts the microphone’s TRS connector into a TRRS connector. This allows you to connect the microphone to your smartphone’s headphone jack.
